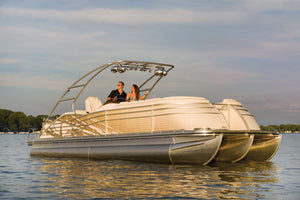

BoatUS Spring Commissioning Checklist
Boat Owners Association of The United States (BoatUS) offers its Spring Commissioning Checklist to help boaters start the season right. The nation’s largest advocacy, service and savings group also offers BoatUS.com/Spring, a one-stop-shop for everything you need to know about the yearly ritual of recreational boat commissioning. A PDF copy of the checklist is available to download, print, and take to the boat with you. Be sure to follow all manufacturer recommendations for your specific boat, engine and accessories.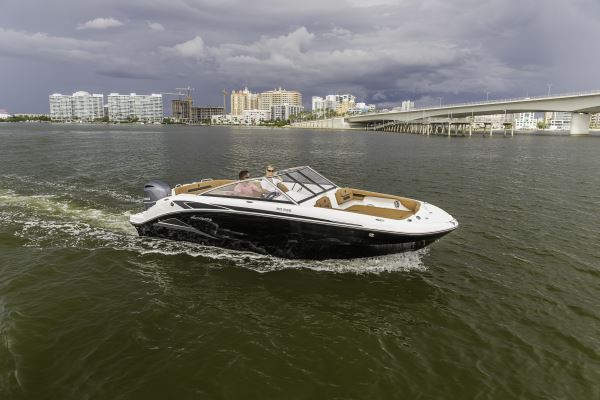 Before You Launch
- Inspect all around the hose clamps for rust and replace as necessary. Double clamp fuel lines and exhaust hoses with marine-rated stainless steel hose clamps. While not technically required, it’s wise to double clamp whenever possible on all hoses — especially those below the waterline.
- Inspect all hoses for stiffness, rot, leaks and cracking, and replace any that are faulty. Make sure they fit snugly.
- Inspect prop(s) for dings, pitting and distortion. Make sure cotter pins are secure.
- Grip the prop (on inboard drive systems) and try moving the shaft up and down and side to side. If it’s loose and can be wiggled, the cutless bearing may need to be replaced.
- Check the rudderstock to ensure it hasn’t been bent. Operate the wheel or tiller to ensure the steering works correctly. Check the rudder bearing and steering cable for unusual play or movement.
- Inspect the hull for blisters, distortions and stress cracks.
- Make sure your engine intake sea strainer (if equipped) is not cracked or bent from ice and is free of corrosion, clean and properly secured.
- With inboards, check the engine shaft and rudder stuffing boxes for correct adjustment. A stuffing box should leak no more than two or three drops each minute when the prop shaft is turning. Check the shaft log hose for deterioration and rusty hose clamps.
- Inspect, lubricate and exercise thru-hull valves. It’s a good idea to tie a right-sized wooden bung to the valve in case of failure.
- Use a garden hose to check for deck leaks at ports and hatches. Renew caulk or gaskets as necessary.
- Inspect and test the bilge pump and float switch to ensure they’re both working properly. Also inspect the pump’s hose.
- Check stove and remote LPG tanks for loose fittings, leaking hoses and properly functioning shutoff systems. Use the pressure gauge to conduct a leak down test to check for system leaks.
- Inspect dock and anchor lines for chafe and wear.
- If equipped, ensure that the stern drain plug is installed.
- After the boat is launched, be sure to check all thru-hulls for leaks.
.jpg_600.jpg) Engines and Fuel Systems
Engines and Fuel Systems
- Inspect fuel lines, including fuel tank fill and vent hoses, for softness, brittleness or cracking. Check all joints for leaks, and make sure all lines are well supported with noncombustible clips or straps with smooth edges.
- Inspect fuel tanks, fuel pumps and filters for leaks. Ensure portable tanks and lines are completely drained of stale fuel before filling with fresh fuel. Clean or replace fuel filters and/or fuel-water separators if not done before winterization.
- Every few years, remove and inspect exhaust manifolds and risers for corrosion (for inboard-powered and inboard/outboard boats).
- Charge battery.
- Clean and tighten electrical connections, especially both ends of battery cables. Use a wire brush to clean battery terminals, and top off cells with distilled water (if applicable).
- Inspect the bilge ventilation intake and blower ducting for damage or leaks and run the blower to confirm correct operation.
- Test engine warnings and alarms.
.jpg_600.jpg) Engine Outdrives and Outboards
Engine Outdrives and Outboards
- Inspect rubber outdrive bellows for cracked, dried and/or deteriorated spots (look especially in the folds) and replace if suspect.
- Check power steering and power trim oil levels.
- Replace anodes/zincs that are more than half wasted.
- Inspect the outer jacket of control cables. Cracks or swelling indicate corrosion and mean that the cable must be replaced.
- Inspect lower unit oil level and top off as necessary.
 Trailers
- Inspect tire treads and sidewalls for cracks or lack of tread and replace as necessary. Check air pressure; don’t forget the spare.
- Inspect wheel bearings and repack as necessary.
- Test all lights and replace any broken bulbs or lenses.
- Inspect winch to make sure it’s working properly. Inspect hitch chains.
- Inspect trailer frame and axel(s) for rust. Sand and paint to prevent further deterioration.
- Inspect brakes and brake fluid reservoir.
Safety
- A new law that went into effect in 2021 requires a vessel operator to use either a helm or outboard lanyard or wireless engine cutoff switch on certain vessels less than 26 feet when traveling on plane or above displacement speed, so be sure your switch is working properly and the lanyard is in serviceable condition. If you use a wireless cutoff switch, ensure batteries in the fobs and wrist worn devices are refreshed.
- Flares expire after 42 months so check expiration dates.
- Inspect fire extinguishers. A new regulation that goes into effect April 20, 2022, requires a 12-year expiration for disposables and has different carriage requirements for older and newer model year vessels.
- Ensure you have properly sized and wearable life jackets in good condition for each passenger, including kids. Check inflatable life jacket cylinders and dissolvable “pill” bobbins in auto-inflating models.
- Test smoke, carbon monoxide, fume and bilge alarms.
- Check running lights for operation and spare bulb inventory.
- Update chartplotter software.
- Replenish first-aid kit items that may have been used last season or are expired.
- Check the operation of VHF radio(s) and that the MMSI number is correctly programmed in. (BoatUS members can obtain a free MMSI number at BoatUS.com/MMSI.)
- Get a free vessel safety check from the U.S. Coast Guard Auxiliary or U.S. Power Squadrons. Find out more at cgaux.org/vsc
For the Dock
- In addition to checking its entire length for wear or abrasions, check both ends of the shore power cable connections as well as the shore power receptacle on the boat for burns, which indicate the cable and/or boat’s shore power inlet or the dock’s receptacle must be replaced.
- Test ground-fault protection on your boat and private dock, and know how to prevent Electric Shock Drowning.
The Paperwork
- Make sure your boat registration is up to date – and dinghy if you have one. Don’t forget your boat trailer tags
- Review your boat insurance policy and update coverage if needed. BoatUS provides free quotes at BoatUS.com/Insurance. Provide a copy to your marina or club.
- Ensure your BoatUS membership is in good standing, and check your TowBoatUS coverage by logging into BoatUS.com/Account, or join at BoatUS.com/Membership.
- Download the free BoatUS App (BoatUS.com/App to make it easy to summon on-water assistance and speed response times as well to check tide tables, weather, and partner discounts.
For more tips from BoatUS, visit boatus.com.
- Mindy Goodman
- Tags: boating pontoon boat spring


Spring Boat Preparation | Pontoon Depot
Getting the boat ready for the season is a lot like getting the boat ready to sell. You want it to look good and operate without any problems. That means you need to do a little preparation before you take it out on the lake for the first time. The last thing an owner wants to do is experience an engine failure or even worse, a fire on the first boating weekend of the season!
This is a basic list that is used on canoes to cruisers and everything in between. To make sure the first flotation is good for the family, let’s talk about a little spring season preparation. Breaking the springtime maintenance into about five different steps makes it seem easier. There is no way we can go over all the details necessary but I’ll try to give you a pretty quick run down. Each boat is going to be different, along with each boat owner and what they feel comfortable undertaking.
Exterior hull
Do a general cleaning of hull, deck and topsides using a mild detergent or vinegar and water. At the same time check to make sure all the drains and scuppers are clear of debris and flow freely.
This is also a good time to put on the coat of a good quality carnauba paste wax. Okay, if you don’t want to use a paste wax, use a good quality liquid wax. Whatever kind of wax you decide to use, it is important to get a good coat on the gel coat to protect the finish. Gel coat will oxidize and develop a chalk-like coating. Gel coat also breaks down over time due to the UV rays. Waxing the surface helps to prevent UV damage. If there are any small spider cracks, wax will help to seal the cracks to moisture. Plus the boat looks better and has to go faster, because the surface is so slick.
This is also the time to look into repairing any chips or cracks in finish. Small nicks and scratches can often times be polished out with a cordless power buffer or even a cloth and polishing compound. If you don’t have any polishing compound you can always do a temporary polishing with a tube of original Crest toothpaste. The fine abrasive in the toothpaste will help smooth out the scratches and imperfections.
If the scratch is deep enough that it needs touch up, buy a gel coat touch up kit or simpler yet, use finger nail polish to hide the scratch. Finger nail polish is not a permanent solution but it is an easy way to cover a scratch and the color choices are almost unlimited.
If you have any big nicks or blisters that need to be filled you can use gel coat to do the job. One thing you will have to do is carve or grind the edges of the nicked area back to remove any loose gel coat and bevel the edges so the filler can bond to the underlying fiberglass. The edges can be beveled with a razor knife or even a Dremel cordless tool. If fiberglass repair is not your specialty, take the boat to a shop and have them touch up the nicks. One thing you don’t want is holes, blisters or chips allowing water get under the gel coat.
If you have an aluminum boat you look for dents, dings and signs of loose rivets (black soot around the rivet). Dents just slow the boat down (not much if they are small) and loose rivets need to be re-set to make sure they do not leak.
If you leave your boat in the water for the season, make sure your barrier paint and anti-fouling paint are in good condition. This is the time to do any touch ups.
Of course, this is also the time that you will look over all the fittings. Check cleats, stanchions, and brackets to make sure they are tight and do not have sharp edges or corrosion. Any damage to the fittings can catch clothes or skin and damage ropes.
Most new boats have reduced the amount of wood and carpet used on the exterior of the boat, but if you have wood or carpet look for chips and tears. Wood should be sanded or smoothed to prevent splinters and catching of skin and clothes. A good wood sealer or teak oil should be applied to the wood to help protect the surface from the elements. Depending on your location you may need to add a coating to the wood again later in the year.
Carpet should be kept vacuumed with a good wet and dry vacuum. Clean, dry carpet lasts longer and has less opportunity to build up mold and mildew.
Each boat is different so the list can get quite long. That’s why it is best to start on the outside of the boat and just start working your way around it. By going slow and taking your time inspecting everything you will have a better chance of catching even the smallest of details. And don’t forget to look at items like rub rails, swim platforms, boarding ladders, sacrificial zincs and even running lights.
While you are inspecting the exterior of the boat make sure you look for soft areas of the deck. Many boats use a core material between two layers of fiberglass. This core gives the boat strength without the weight required if it was all glass construction. But the core is often made from a porous material such as balsa wood or foam. The core can become damaged by moisture that seeps in through holes, cracks or seams. Once the core is saturated it gains weight and loses its strength and integrity. If you have ever walked on a deck that felt spongy, that’s probably from a damaged core. Soft or damaged cores are usually not an easy or cheap fix. Making sure the fittings, stanchions, blocks or any other items mounted to the deck are sealed and tightened appropriately.
If you happen to be the owner of a sail boat you will also have the additional inspections of the standing and running rigging. Make sure you look for corrosion, bends or wear spots. The sail track should be cleaned and lubricated with a dry lube. Don’t forget to check the spreaders and boots so that they do not have damage that can ruin your sails.
Interior
Cleaning the interior includes not only the fabric and carpets, but also checking for leaks or signs of damage to the hull, hatches and port holes. Most interior fabrics can be cleaned with any household fabric cleaner. Dedicated vinyl cleaners are available for cleaning and protecting the vinyl seats and cushions.
This is also a time when any wood trim or joinery should be cleaned and protected with an appropriate material such as teak oil, polyurethane, etc. If your boat happened to develop moisture during the storage, you may need to remove a little mold and mildew from the surfaces. It’s a good idea to wipe all the surfaces down with an anti-bacterial cleaner anyway, even if you don’t see mold spots.
Once the basic interior is cleaned it is time to look into bilges, under engines and at storage tanks. Clean the bilges by checking for any debris or oil that might have dropped or seeped into the area. If there is oil in the bilges you have to find the leak before putting the boat in the water. You will also need to check the bilge pumps for operation. Make sure you check both the automatic and manual operation if necessary. If you only have one bilge pump you may want to take the time to install a backup. If you leave your boat on the water for the season a backup pump can be a lifesaver during a heavy rain.
Of course, while you’re digging around in the bilge areas, check, test and lubricate all the seacocks. Make sure you inspect any hoses and clamps. It’s highly recommended that any hoses that are below the waterline get a little extra protection by being double clamped. This might also be the time to make sure you have a few appropriately-sized wooden plugs as emergency stoppers for through-hull fittings.
Systems
Depending on the size of your boat the systems could include the head, water galley and electrical components, all of which need to be inspected, cleaned and tested.
If your head is a portable system the checking is pretty simple: make sure the tank is cleaned out, you have chemicals on board and it works.
If you have a permanent system, it’s really not much different. The system needs to be cleaned and lubricated for smooth operations. The tanks need to be cleaned and maybe even flushed if possible. If you have chemical treatments make sure you have a supply on board and accessible. If you have to have your own dump hose for the marina, make sure it’s accessible and not damaged or leaking.
One other thing: if your boat has a Y-valve make sure it is working, labeled for the correct operation and secured in the appropriate position.
The water system is pretty basic. The storage tank needs to be flushed to clean it out. If it was sitting with water in it, you’ll need to run a sanitizer through it. In fact, you should sanitize the tanks even if you had antifreeze in it. Using a pool or spa chlorine will remove bacteria and clean the tank. Once you add the chlorine to the tank, let it sit for a while and then run the water through the system so that the chlorine gets a chance to pass through all the fixtures and drains.
While running the chlorinated water through the system, inspect the hoses, clamps and pumps for leaks. At the same time you can test the water heater to make sure it works. But remember: don’t run the water heater without water in it.
After testing the water system you should inspect, clean, and operate the refrigerator, freezer, stove and any other appliances. Depending on your individual situation, this might include operating the appliances on the shore power, battery power or “gas” (like propane). Any gas fittings should be inspected for dirt, damage and leakage. A small bottle of bubble blowing liquid works great to find leaks in gas line fittings.
The electrical system inspection and preparation can be quite extensive depending on your specific boat. Typically you’ll have batteries that need to be inspected and charged.
If you have a fishing boat you may have the addition of a cleaning station and live wells. The live wells should be checked for operation and leakage. Many boats also have a deck freshwater shower or spray system that needs to be tested.
Engine
It doesn’t matter if you have an inboard or outboard engine, the basics are the same. If you didn’t change the engine oil before parking the boat, now is the time to do it. Oil is the life blood of an engine and needs to be able to efficiently lubricate and cool the engine. Oil is also cheap when compared to an engine overhaul. Reference your engine service manual for recommendations as to the recommended oil change intervals.
If your engine was winterized and treated for storage, you will need to clean or replace the spark plugs and change the fuel filters. It is easiest to just replace the old spark plugs with new ones. But if you are saving a few bucks, you can also clean and re-gap the old ones. All you need is a small stiff-bristled wire brush and gapping tool.
Don’t forget to change the fuel filter before you head out on the water. Also make sure you have the tools and extra fuel filters on board before you go out for your first run. Many a boater has made it out on the water just far enough not to get back and had crud plug the filter, stopping the engine.
Cooling systems should be checked and the fluid replaced or added as necessary. All hoses, wires and belts should be inspected and replaced if dry or cracked. It is a good idea to carry an extra belt or two with you along with the appropriate tools to change the belt. Belt tension should be adjusted per the factory service manual’s recommendations.
Transmission fluid, hydraulic fluids (power steering, power tilt) and oil injection tanks should all be inspected and refilled. While you are at it, check the bellows on the stern drive, packing or stuffing boxes hinge points, U joints etc. Fittings, cables and connections should be lubricated. Many of the components will have grease fitting so that they can be lubricated using a grease gun.
The lower unit, drive shafts and propellers should be inspected for nicks and damage. Basic aluminum propellers (especially on lower horsepower engines) can have minor nicks filed by hand. Paint can be touched up with a spray can of paint from a home supply or auto parts store. But if you have brass, stainless, adjustable blades or any other type of high performance propeller, don’t take the chance of trying to fix it your self. Take the propeller to a good prop shop and have it repaired and balanced. Make sure that when you remove the propeller that you lubricate the shaft to prevent corrosion and assist in removal in the future. It is always a good idea to have a back up prop on hand along with the appropriate nut or cotter keys.
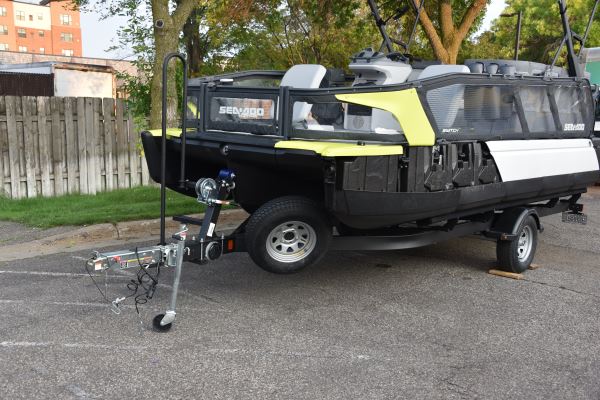
Trailer
Trailers should be checked before use as well. Being parked on the side of the road because of a flat tire or a bad wheel bearing really puts a damper on the weekend boating excitement. Lubricate and inspect the hitch coupler. Safety chains might keep the trailer from getting away from the vehicle when the coupler comes undone, but why have that happen in the first place? The coupler needs to be free to move but at the same time fit tight over the trailer hitch ball.
Check the air pressure and inspect the tire treads and sidewalls for cracks. Low pressure can cause the trailer to start swaying and potentially cause the loss of control.
Inspect the bearings and repack if necessary. Don’t rely on just pumping more grease into the hub. The bearing should be cleaned and repacked at least once a year or so. Bearing greasers do help keep water and air out of the hub, but over time the grease gets heated and hard and doesn’t provide the lubrication it needs to. The only way to prevent damage is to clean and repack the bearings. If you use the trailer in salt water, check to make sure you can flush the hubs and brake to prevent corrosion.
Also test all the tail and back-up lights and the wiring on the tow vehicle. Additionally, if there is rust or corrosion on the trailer frame it should be cleaned and repaired. Any damaged rollers or pads should be replaced or repaired also.
Extras
Extras are personal flotation devices, safety equipment and paper work. Remember, don’t leave home without it means more than the boat. Make sure you have enough personal floatation devices for the rated number of the boat or at least for the number of people that you take with you.
You’ll want a safe and dry place to keep the registration and insurance paperwork. You also want to make sure that all of your fire suppression and extinguishing systems are fully charged and in working order. If there are inspections required, make sure they are done before you head out on the water. One other thing to think about is having a good marine first aid kit.
Again, this is just a very brief overview of the preparation a boat owner needs to go through to get ready for the season. Each boat will be a little different depending on the specific systems. If any of this seems like something the boat owner doesn’t want to undertake, call the boat service center and have them get the boat ready.
Before you take the boat to the water
- Exterior inspection
-
Wash , wax and repair - Fitting and cleats
-
- Interior
- Clean and patch cushions and carpet
- Clean and protect wood
- Bilges, tanks and through hulls
- Systems
- Head
- Water
- Galley
- Engines
- Oil change
- Fuel systems
- Cooling systems
- Drive units
- Propellers
- Trailer
- Couplers
- Tires and wheels
- Bearings
- Lights
- Extras
- PFD
- Fire protection
- Registrations
- Insurance
About The Author
Scott “Sky” Smith is the author of “Ultimate Boat Maintenance Projects” and an independent agent insuring boats, custom vehicles, drones and aircraft nationwide. Sky@SkySmith.com. Follow on Twitter@scottskysmith.
- Amy Cabanas
- Tags: bad boating habits boat block party boat dinner party Boat Towing Boating Boating at Night Boating Safety DIY DIY Boat maintenance Entertainment Family fishing tips fishing weather How to Drive Lakes life jacket Marideck Flooring Pontoon Accessories pontoon boat pontoon boat deck pontoon boat furniture pontoon boat marine vinyl flooring Pontoon boat navigational lighting Pontoon Boat Operating Pontoon Boat Racks pontoon boat Refurbishing Pontoon Boat relaxation pontoon boat seating Pontoon Boat Storage respectful boating safe boating habits Spring summer summer snacks Swimming tips water skiing