Free Shipping on Most Orders Over $100

News — Boat Towing

RSS
What You Need to Tow

What You Need to Tow

Recently I was questioned by a new boat buyer about towing boats. In this case the question was in reference to the towing capacity of a small SUV with a tow capacity of 3,500 pounds. 
Spring Boat Preparation | Pontoon Depot

Spring Boat Preparation | Pontoon Depot

Getting the boat ready for the season is a lot like getting the boat ready to sell.  You want it to look good and operate without any problems. That means you need to do a little preparation before you take it out on the lake for the first time. The last thing an owner wants to do is experience an engine failure or even worse, a fire on the first boating weekend of the season!

This is a basic list that is used on canoes to cruisers and everything in between. To make sure the first flotation is good for the family, let’s talk about a little spring season preparation. Breaking the springtime maintenance into about five different steps makes it seem easier. There is no way we can go over all the details necessary but I’ll try to give you a pretty quick run down. Each boat is going to be different, along with each boat owner and what they feel comfortable undertaking.

Exterior hull

Do a general cleaning of hull, deck and topsides using a mild detergent or vinegar and water. At the same time check to make sure all the drains and scuppers are clear of debris and flow freely.

This is also a good time to put on the coat of a good quality carnauba paste wax. Okay, if you don’t want to use a paste wax, use a good quality liquid wax. Whatever kind of wax you decide to use, it is important to get a good coat on the gel coat to protect the finish. Gel coat will oxidize and develop a chalk-like coating. Gel coat also breaks down over time due to the UV rays. Waxing the surface helps to prevent UV damage. If there are any small spider cracks, wax will help to seal the cracks to moisture. Plus the boat looks better and has to go faster, because the surface is so slick.

This is also the time to look into repairing any chips or cracks in finish. Small nicks and scratches can often times be polished out with a cordless power buffer or even a cloth and polishing compound. If you don’t have any polishing compound you can always do a temporary polishing with a tube of original Crest toothpaste. The fine abrasive in the toothpaste will help smooth out the scratches and imperfections.  

If the scratch is deep enough that it needs touch up, buy a gel coat touch up kit or simpler yet, use finger nail polish to hide the scratch. Finger nail polish is not a permanent solution but it is an easy way to cover a scratch and the color choices are almost unlimited.

If you have any big nicks or blisters that need to be filled you can use gel coat to do the job. One thing you will have to do is carve or grind the edges of the nicked area back to remove any loose gel coat and bevel the edges so the filler can bond to the underlying fiberglass. The edges can be beveled with a razor knife or even a Dremel cordless tool. If fiberglass repair is not your specialty, take the boat to a shop and have them touch up the nicks. One thing you don’t want is holes, blisters or chips allowing water get under the gel coat.

If you have an aluminum boat you look for dents, dings and signs of loose rivets (black soot around the rivet). Dents just slow the boat down (not much if they are small) and loose rivets need to be re-set to make sure they do not leak.

If you leave your boat in the water for the season, make sure your barrier paint and anti-fouling paint are in good condition. This is the time to do any touch ups.

Of course, this is also the time that you will look over all the fittings. Check cleats, stanchions, and brackets to make sure they are tight and do not have sharp edges or corrosion. Any damage to the fittings can catch clothes or skin and damage ropes.

Most new boats have reduced the amount of wood and carpet used on the exterior of the boat, but if you have wood or carpet look for chips and tears. Wood should be sanded or smoothed to prevent splinters and catching of skin and clothes. A good wood sealer or teak oil should be applied to the wood to help protect the surface from the elements. Depending on your location you may need to add a coating to the wood again later in the year.

Carpet should be kept vacuumed with a good wet and dry vacuum. Clean, dry carpet lasts longer and has less opportunity to build up mold and mildew.

Each boat is different so the list can get quite long. That’s why it is best to start on the outside of the boat and just start working your way around it. By going slow and taking your time inspecting everything you will have a better chance of catching even the smallest of details.  And don’t forget to look at items like rub rails, swim platforms, boarding ladders, sacrificial zincs and even running lights.

While you are inspecting the exterior of the boat make sure you look for soft areas of the deck. Many boats use a core material between two layers of fiberglass. This core gives the boat strength without the weight required if it was all glass construction. But the core is often made from a porous material such as balsa wood or foam. The core can become damaged by moisture that seeps in through holes, cracks or seams. Once the core is saturated it gains weight and loses its strength and integrity. If you have ever walked on a deck that felt spongy, that’s probably from a damaged core. Soft or damaged cores are usually not an easy or cheap fix. Making sure the fittings, stanchions, blocks or any other items mounted to the deck are sealed and tightened appropriately.

If you happen to be the owner of a sail boat you will also have the additional inspections of the standing and running rigging. Make sure you look for corrosion, bends or wear spots. The sail track should be cleaned and lubricated with a dry lube. Don’t forget to check the spreaders and boots so that they do not have damage that can ruin your sails. 

Interior

Cleaning the interior includes not only the fabric and carpets, but also checking for leaks or signs of damage to the hull, hatches and port holes. Most interior fabrics can be cleaned with any household fabric cleaner. Dedicated vinyl cleaners are available for cleaning and protecting the vinyl seats and cushions.

This is also a time when any wood trim or joinery should be cleaned and protected with an appropriate material such as teak oil, polyurethane, etc. If your boat happened to develop moisture during the storage, you may need to remove a little mold and mildew from the surfaces. It’s a good idea to wipe all the surfaces down with an anti-bacterial cleaner anyway, even if you don’t see mold spots.

Once the basic interior is cleaned it is time to look into bilges, under engines and at storage tanks. Clean the bilges by checking for any debris or oil that might have dropped or seeped into the area. If there is oil in the bilges you have to find the leak before putting the boat in the water.  You will also need to check the bilge pumps for operation. Make sure you check both the automatic and manual operation if necessary. If you only have one bilge pump you may want to take the time to install a backup. If you leave your boat on the water for the season a backup pump can be a lifesaver during a heavy rain.

Of course, while you’re digging around in the bilge areas, check, test and lubricate all the seacocks. Make sure you inspect any hoses and clamps. It’s highly recommended that any hoses that are below the waterline get a little extra protection by being double clamped. This might also be the time to make sure you have a few appropriately-sized wooden plugs as emergency stoppers for through-hull fittings.

Systems

Depending on the size of your boat the systems could include the head, water galley and electrical components, all of which need to be inspected, cleaned and tested.

If your head is a portable system the checking is pretty simple: make sure the tank is cleaned out, you have chemicals on board and it works.

If you have a permanent system, it’s really not much different. The system needs to be cleaned and lubricated for smooth operations. The tanks need to be cleaned and maybe even flushed if possible. If you have chemical treatments make sure you have a supply on board and accessible. If you have to have your own dump hose for the marina, make sure it’s accessible and not damaged or leaking.  

One other thing: if your boat has a Y-valve make sure it is working, labeled for the correct operation and secured in the appropriate position.

The water system is pretty basic. The storage tank needs to be flushed to clean it out. If it was sitting with water in it, you’ll need to run a sanitizer through it. In fact, you should sanitize the tanks even if you had antifreeze in it. Using a pool or spa chlorine will remove bacteria and clean the tank. Once you add the chlorine to the tank, let it sit for a while and then run the water through the system so that the chlorine gets a chance to pass through all the fixtures and drains.

While running the chlorinated water through the system, inspect the hoses, clamps and pumps for leaks. At the same time you can test the water heater to make sure it works. But remember: don’t run the water heater without water in it.

After testing the water system you should inspect, clean, and operate the refrigerator, freezer, stove and any other appliances. Depending on your individual situation, this might include operating the appliances on the shore power, battery power or “gas” (like propane). Any gas fittings should be inspected for dirt, damage and leakage. A small bottle of bubble blowing liquid works great to find leaks in gas line fittings.

The electrical system inspection and preparation can be quite extensive depending on your specific boat. Typically you’ll have batteries that need to be inspected and charged. Battery fluid levels need to be checked and the terminals should be cleaned and lubricated to prevent corrosion. Fuses, breakers and wiring should be inspected for corrosion, damage, cracks, worn spots, signs of arcing and operation.

If you have a fishing boat you may have the addition of a cleaning station and live wells. The live wells should be checked for operation and leakage. Many boats also have a deck freshwater shower or spray system that needs to be tested.

Engine

It doesn’t matter if you have an inboard or outboard engine, the basics are the same. If you didn’t change the engine oil before parking the boat, now is the time to do it. Oil is the life blood of an engine and needs to be able to efficiently lubricate and cool the engine. Oil is also cheap when compared to an engine overhaul. Reference your engine service manual for recommendations as to the recommended oil change intervals.

If your engine was winterized and treated for storage, you will need to clean or replace the spark plugs and change the fuel filters. It is easiest to just replace the old spark plugs with new ones. But if you are saving a few bucks, you can also clean and re-gap the old ones. All you need is a small stiff-bristled wire brush and gapping tool.

Don’t forget to change the fuel filter before you head out on the water. Also make sure you have the tools and extra fuel filters on board before you go out for your first run. Many a boater has made it out on the water just far enough not to get back and had crud plug the filter, stopping the engine.

Cooling systems should be checked and the fluid replaced or added as necessary. All hoses, wires and belts should be inspected and replaced if dry or cracked. It is a good idea to carry an extra belt or two with you along with the appropriate tools to change the belt. Belt tension should be adjusted per the factory service manual’s recommendations.

Transmission fluid, hydraulic fluids (power steering, power tilt) and oil injection tanks should all be inspected and refilled. While you are at it, check the bellows on the stern drive, packing or stuffing boxes hinge points, U joints etc. Fittings, cables and connections should be lubricated. Many of the components will have grease fitting so that they can be lubricated using a grease gun.

The lower unit, drive shafts and propellers should be inspected for nicks and damage. Basic aluminum propellers (especially on lower horsepower engines) can have minor nicks filed by hand. Paint can be touched up with a spray can of paint from a home supply or auto parts store. But if you have brass, stainless, adjustable blades or any other type of high performance propeller, don’t take the chance of trying to fix it your self. Take the propeller to a good prop shop and have it repaired and balanced. Make sure that when you remove the propeller that you lubricate the shaft to prevent corrosion and assist in removal in the future. It is always a good idea to have a back up prop on hand along with the appropriate nut or cotter keys.

Trailer

Trailers should be checked before use as well. Being parked on the side of the road because of a flat tire or a bad wheel bearing really puts a damper on the weekend boating excitement. Lubricate and inspect the hitch coupler. Safety chains might keep the trailer from getting away from the vehicle when the coupler comes undone, but why have that happen in the first place? The coupler needs to be free to move but at the same time fit tight over the trailer hitch ball.

Check the air pressure and inspect the tire treads and sidewalls for cracks. Low pressure can cause the trailer to start swaying and potentially cause the loss of control.

Inspect the bearings and repack if necessary. Don’t rely on just pumping more grease into the hub. The bearing should be cleaned and repacked at least once a year or so. Bearing greasers do help keep water and air out of the hub, but over time the grease gets heated and hard and doesn’t provide the lubrication it needs to. The only way to prevent damage is to clean and repack the bearings. If you use the trailer in salt water, check to make sure you can flush the hubs and brake to prevent corrosion.

Also test all the tail and back-up lights and the wiring on the tow vehicle. Additionally, if there is rust or corrosion on the trailer frame it should be cleaned and repaired. Any damaged rollers or pads should be replaced or repaired also.

Extras

Extras are personal flotation devices, safety equipment and paper work. Remember, don’t leave home without it means more than the boat. Make sure you have enough personal floatation devices for the rated number of the boat or at least for the number of people that you take with you.

You’ll want a safe and dry place to keep the registration and insurance paperwork. You also want to make sure that all of your fire suppression and extinguishing systems are fully charged and in working order. If there are inspections required, make sure they are done before you head out on the water. One other thing to think about is having a good marine first aid kit.

Again, this is just a very brief overview of the preparation a boat owner needs to go through to get ready for the season. Each boat will be a little different depending on the specific systems. If any of this seems like something the boat owner doesn’t want to undertake, call the boat service center and have them get the boat ready. 

Before you take the boat to the water

  1. Exterior inspection
    1. Wash, wax and repair
    2. Fitting and cleats
  2. Interior     
    1. Clean and patch cushions and carpet
    2. Clean and protect wood
    3. Bilges, tanks and through hulls
  3. Systems
    1. Head
    2. Water
    3. Galley
  4. Engines
    1. Oil change
    2. Fuel systems
    3. Cooling systems
    4. Drive units
    5. Propellers
  5. Trailer
    1. Couplers
    2. Tires and wheels
    3. Bearings
    4. Lights
  6. Extras
    1. PFD
    2. Fire protection
    3. Registrations
    4. Insurance


About The Author

Scott “Sky” Smith is the author of “Ultimate Boat Maintenance Projects” and an independent agent insuring boats, custom vehicles, drones and aircraft nationwide. Sky@SkySmith.com. Follow on Twitter@scottskysmith.

5 Essential Tips for Trailering a Pontoon Boat | Pontoon-Depot

5 Essential Tips for Trailering a Pontoon Boat | Pontoon-Depot

Trailering a pontoon boat can be intimidating the first few times you do it, and you’re likely to end up with a few dings and bends on the boat or trailer if you aren’t careful.  I’ve learned the following tips mostly the hard way, so I hope they are helpful for you as you learn to trailer your toon.

#1: Don’t trailer in high winds

We’ve all made the mistake of staying out on the water a little too long and not getting out of the lake when nasty weather comes.

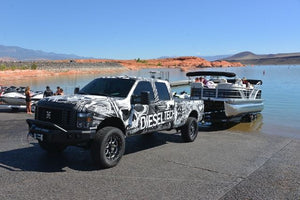
One of the first times I was out in my brand new G3 Pontoon boat, I saw a storm approaching but took a few extra spins on the lake before heading for the dock–thinking I could beat the storm.

I learned the hard way that pontoon boats turn into huge sails when the winds are up.  The large fencing around the boat makes it difficult to navigate against the wind.  In the end, it took 6 men to push the boat into position and get it on the trailer.

#2: Get a dock hook

A dock hook is a long telescoping rod with a hook on the end that boaters can use to grab dock cleats and pull the back end of the boat into position when the wind is pushing against you.

#3: Don’t pull the trailer in too deep

One of the biggest problems I had when learning to trailer my toon was pulling the trailer in too deep into the water.  When you do this, the boat is still floating, so even if you pull straight onto the trailer, the winds push the back of the boat off to the side since the back is still floating.

Just pull the trailer in deep enough that the tops of the wheel wells are barely under and you’ll have much better results.

The best method I’ve found is to pull the trailer back until the wheel wells are wet, and bring up the front of the boat.  Then, have the driver of the truck go slightly deeper, and you can then drive the boat the rest of the way up the trailer.

#4: Use the dock as a drift break

If you have winds or waves pushing the boat which makes trailering tough, have your truck driver put the trailer up close to the downwind side of the dock.  By doing this, the dock will break some of the wind and waves from pushing the boat.  Also, you can use your dock hook to pull the back over to the dock and keep it from drifting.

#5: Get everyone off the boat, or at least the front of the boat

Having weight in the front of the boat makes getting the pontoon boat on the trailer a lot more difficult.  You’re driving the boat onto the trailer, so additional weight means you need to use more thrust on the engine to get up the trailer.

Also, having passengers in the boat obstructs your view of the trailer to make sure you’re on straight.

I usually let everyone off the boat and then get the pontoon on the trailer myself to avoid this problem.

Article re-posted from: http://pontoonguide.com/9-essential-tips-docking-pontoon-boat/

Free App From Boat U.S. Boating Services | Pontoon-Depot

Free App From Boat U.S. Boating Services | Pontoon-Depot

Take a tour of the latest smartphone app from Boat Owners Association of The United States (BoatUS). The latest version for iPhone and Android devices is available from http://www.BoatUS.com/App features tides, weather, photos and more!

A great app for all boaters, but especially useful to BoatUS Members when calling for a tow, as just one push of a button connects you to the nation's largest network of on-water towers with over 300 ports nationwide.


Boat Owners Association of The United States – is the oldest and largest association of boaters, for boaters. BoatUS focuses on providing boaters the highest quality boating services, significant savings, and a strong voice.

http://www.BoatUS.com/